
- Setup
- Creating financial Tag rules
- Copy a financial Tag rule
- How financial Tagging rules apply to transactions
- Conclusion
In version 10.0.32 of D365FO, Microsoft introduced the Financial Tags. Financial Tags are used to extend accounting information to the general ledger with additional pre-defined data for analyzing and reporting accounting to the general ledger. The option is somewhat similar to the financial dimensions, but its use is more flexible.
Whereas up to now, the values of the Financial Tags had to be entered manually during transactions, the functionality “Rules of Financial Tags” allows you to configure automatic entry of data of the Financial Tags values during transactions. This changes the game in the use of Financial Tags!
Financial Tag rules provide an effective way to enter a default value or automatically populated values in your financial Tags. They streamline the process and ensure consistency and efficiency in transaction Tagging. This consistency and efficiency are essential for accurate financial tracking and reporting.
This feature is available from version 10.0.42 of D365 Finance. It is available in Feature Management. In each new version, more document entry points are implemented.
Currently, the following journals are supported for financial Tag rules:
- General journal
- Global general journal: The General Journal and the Global General Journal use a shared set of financial Tag rules.
- Allocation journal
- Reporting currency adjustment journal
- Invoice journal (vendor)
Setup
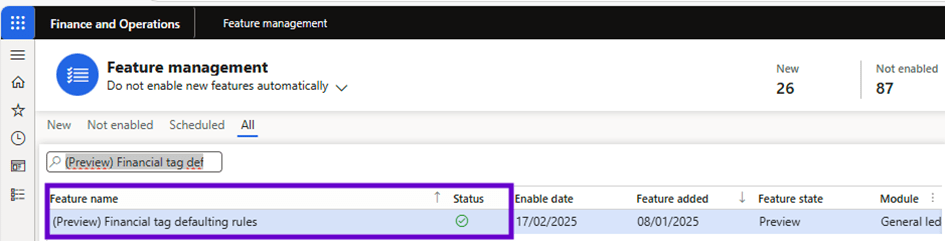
To use this feature, enable the (Preview) Financial Tag defaulting rules feature in Feature Management. The feature can be disabled at any time. If the feature is enabled and then disabled later, all rules defined for financial Tags are retained in the database. However, they are no longer used on any transactions in D365 Finance.
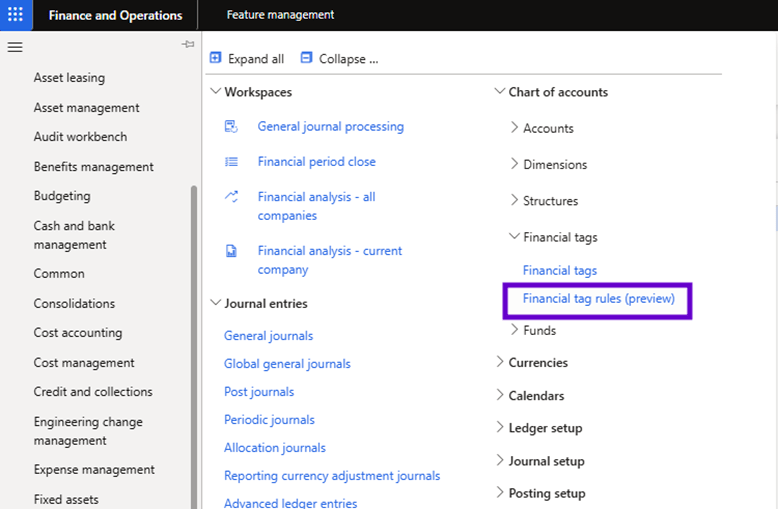
When this feature is enabled, a new menu item “Financial Tag rules” becomes available in the General ledger module:
Before you can use this feature, at least one Financial Tag must be available in the legal entity where you open this form. The Financial Tag does not need to be activated but must be created. If you open the Financial Tag form without any Financial Tags in the legal entity, you will not be able to open the form, but you will receive a notification:
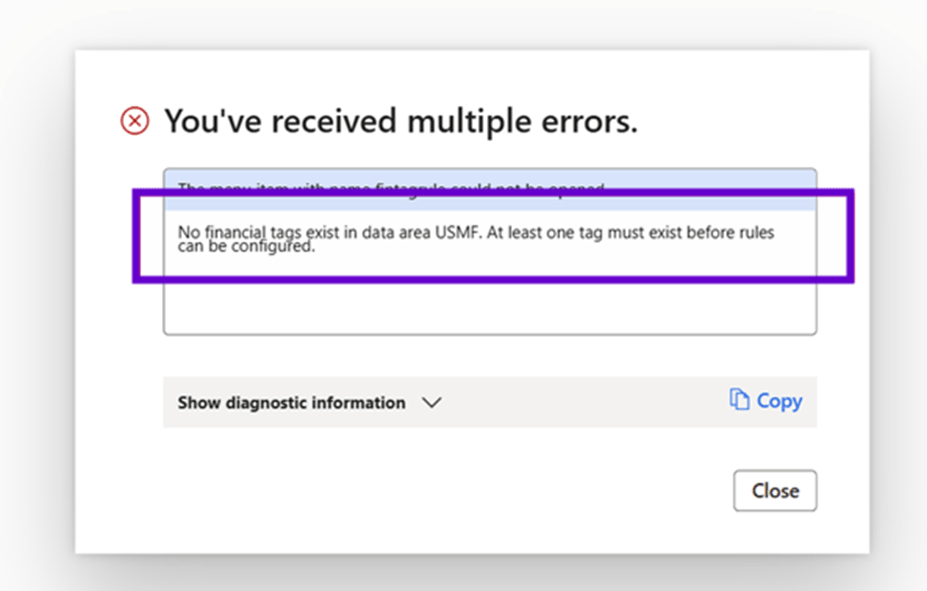
Before you can use the Financial Tag Rules page, at least one financial Tag must be configured in the company where you are creating a rule.

When you have Financial Tags and open the Financial Tag rules form, you will see the available Financial Tags in the legal entity. These will be based on existing default rules (system rules created by Microsoft) or your company-specific rules if they are already created:

Each row of Financial Tag rule enabled is in use.
Creating financial Tag rules
Before creating financial Tag rules, note the following:
- System rules exist to mimic the behavior already used in the current system. In a journal entry, the system rules copy the Tag header values into the account Tag field and the account Tag values into the offset account Tag field. You can enable or disable system rules as needed, but you cannot remove them from the system or modify them in any way.

- Microsoft Power Fx is the language used to define and execute financial Tag rules. Not all formulas are supported in D365 Finance. Additional functionality has been added to the language to allow D365 Finance and tables and fields that can be used with the rule definition.

- Power Fx knowledge is not required to create a rule. The feature has a rule generator that allows you to select the appropriate fields to generate the correct condition so that your rule can be applied.
Create a financial Tag rule
You can create Financial Tags rules for different financial journals that you can use in D365FO to create ledger postings. In the form, these rules are called ” Transaction entry point ” and you can choose General journal’, ‘Allocation journal’, Reporting currency adjustment journal’ ad ‘Vendor invoice journal’.

To create a financial Tag rule, follow these steps:
- Go to General Ledger > Chart of Accounts > Financial Tags Rules (preview) > Financial Tags.
- Select New to create a financial Tag.
The dialog box that appears contains several fields that you can define, including the following three required fields:
- Transaction Entry Point: Specify the document in which data is entered.
- Transaction level: Specify the location or level where financial Tags are located. For example, Header refers to the top-level table that has a set of financial Tags for all rows belonging to this header. Account is a special value for journals, as the general journal has financial Tags for account entry and offset account.
- Target: Specify the exact Tag field you want to set.
- In the Formula tab, enter a Power Fx formula to define the value using the conditional logic of your choice. The result of the function is the value defined on the target financial Tag (that is, the financial Tag you specified in the Target field).

In the documentation, MS describes the supported fields that are enabled for each document or transaction entry point in https://learn.microsoft.com/en-us/dynamics365/finance/general-ledger/financial-Tag-rule-reference.
- In the Conditions tab, create a set of conditions and results that fulfill the target financial Tag.
- Check the Name, Enabled and Overwrite existing values.
- Select OK to save the new rule.

I think this list will be extended later for more posting entry sources, but for now, here are the options you can choose. For this article, I created two Financial Tags, the “VendorGroup” which I linked to the table of supplier groups and the “CorrectionReason” Tag which is a free text field.
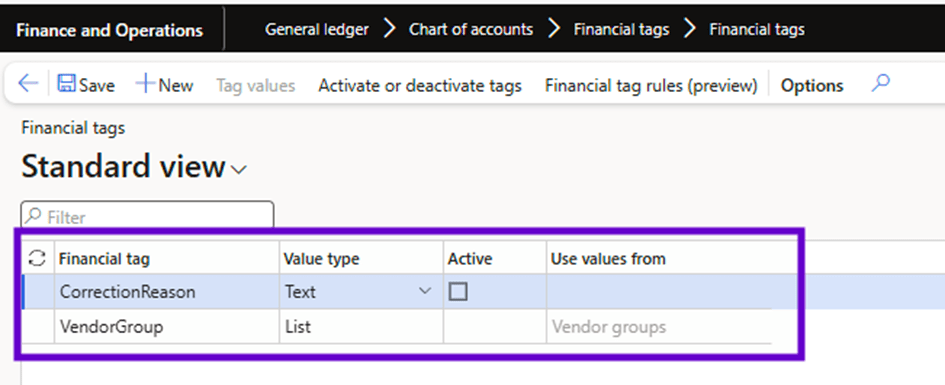
This means that for ledger postings, I can add a group of vendors and a reason for correction as Financial Tag values. I can do this manually, but I will use the Financial Tag rules to add them automatically when entering invoices via the Vendor invoice journal.
The rule for the Vendor group
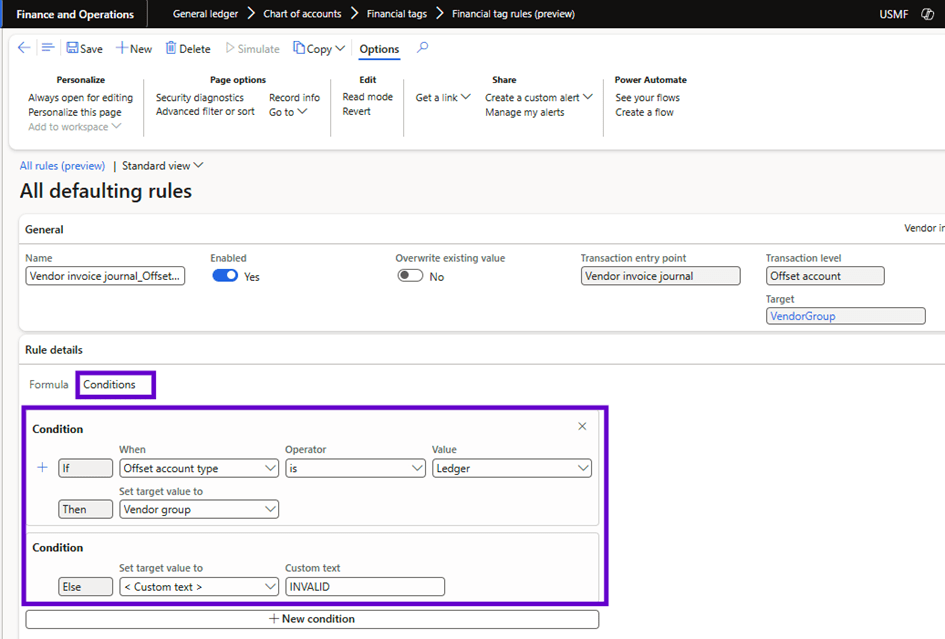
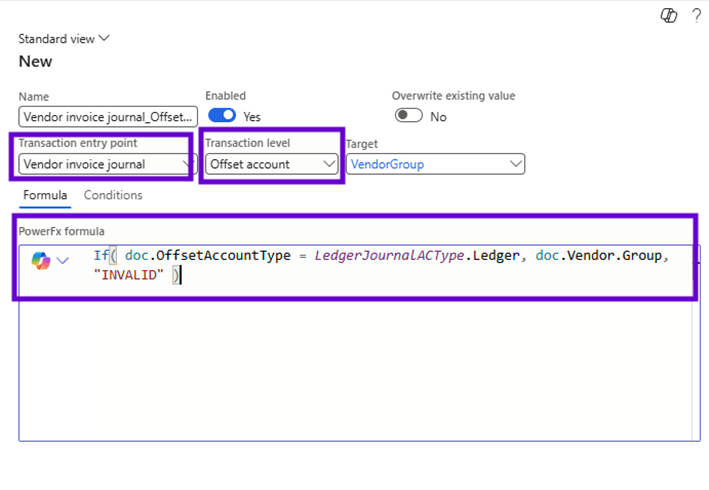
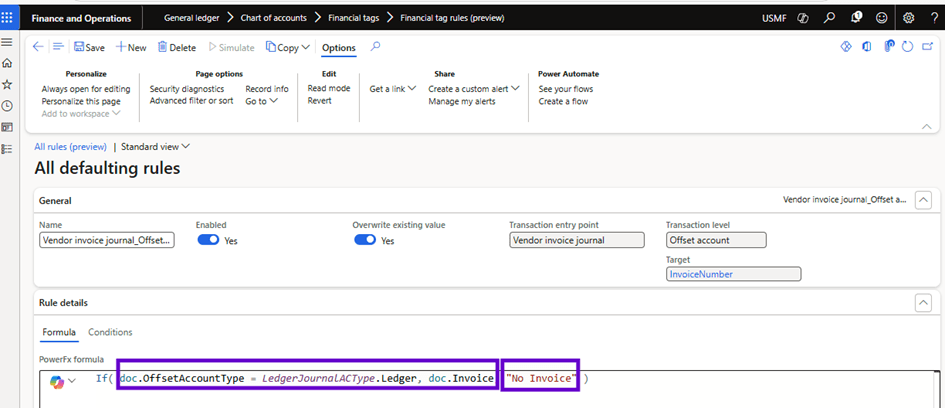
To automatically add the vendor group to the offset transactions of each invoice in the vendor invoice journal, I create a new rule. In this rule, I select the transaction entry point “Vendor invoice journal” and the transaction level “Offset account.” This means that in the Vendor Invoice journal, the target VendorGroup (financial Tag) will be entered at the level of the Offset account(s).
To configure when the rule should be used, you must also enter a PowerFx formula. In my case I have configured the vendor group so that if the Offset account type is “Ledger,” the vendor group must be entered and if I choose another type of Offset account, the value “INVALID” must be used:
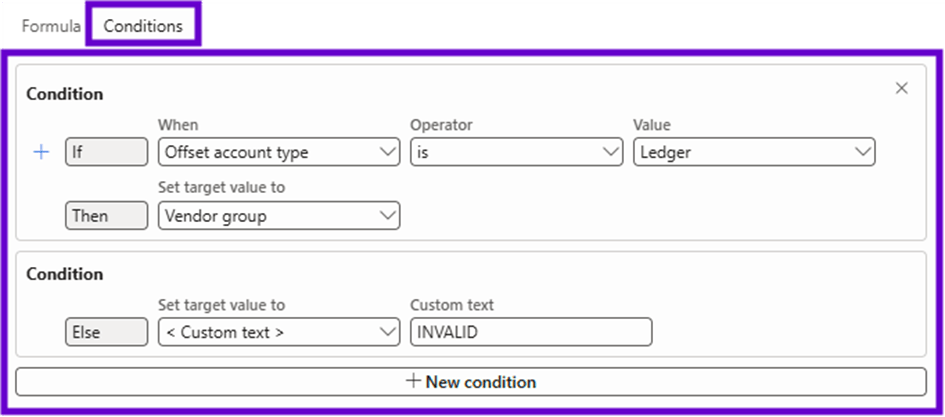
If you are not familiar with the use of PowerFx formulas, you can use the “Conditions” tab to functionally select the necessary use of the Financial Tag, which will result in the required PowerFx formula:
You can also use Copilot to explain the formula or create a new formula:

If you have not enabled Copilot in the D365FO environment, you can still create the Financial Tags rules, but you will not be able to get the Copilot explanation of the formula or create the formula.
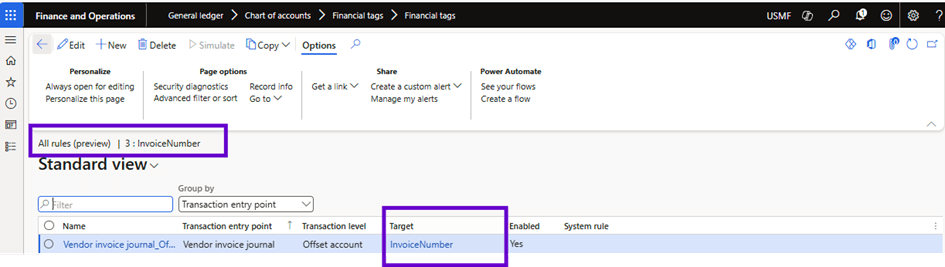
For the use case to automatically enter the vendor invoice number as a financial Tag, I create a second rule:

To ensure that the created Financial Tags rules will be used by D365FO, you must activate them (the field “Enabled” should have the value “Yes”).
Opening the Financial Tags rules via the “Financial Tags” form
You can also open the Financial Tags rules via the “Financial Tags” form:

In this case, you will only see the Financial Tag rules related to the Financial Tag that was selected in the Financial Tags form:
The use of Financial Tags rules in postings
Based on the two rules of Financial Tags created regarding vendor information (invoices), I will start entering a vendor invoice via the invoice journal. When I create a new vendor invoice journal, without entering a line, the ” Offset account” and ” Offset financial Tags” are empty:

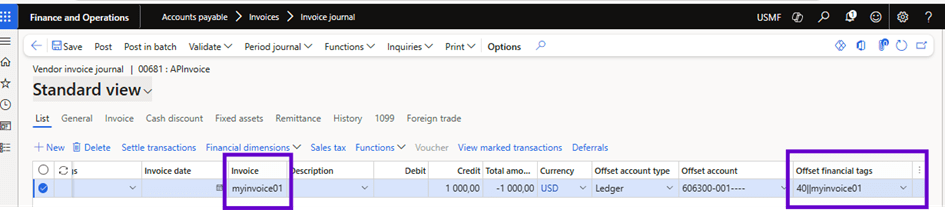
But when I enter the invoice information on the line of the invoice journal, including the Offset account information, the values “Offset financial Tags” are automatically entered:

The values of the field “Offset financial Tags” are as follows:
- Vendor Group “40”
- Invoice number “myinvoice01”.
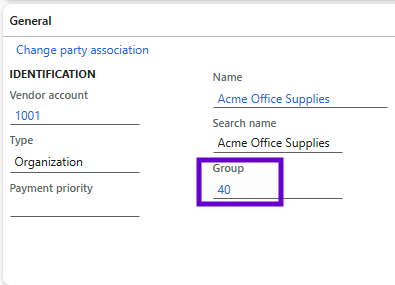
This is due to the fact that the Vendor group of the selected vendor for this invoice has a value of “40”:
And the Vendor invoice number entered in the Vendor Invoice line is “myinvoice01”:
If I change the Offset account type so that it is no longer the “ledger” value and I save the changes, the value of the Financial Tag is automatically changed to “No invoice”:

This is because in the PowerFx formula of the Financial Tag rule, I chose that if the Offset account type is not “ledger,” this value “No invoice” should be entered.
This is possible because the Financial Tag “InvoiceNumber” has a free text value option. In the case of a list, the “Overwrite existing value” field of the Financial Tag rule must be enabled to replace the list value with a value that is not available in the Financial Tags list.
Business value
With the ability to create 20 Financial Tags in D365FO, you can add data (subledger) into general ledger transactions. The value of the Financial Tags is presented in separate columns in the transaction information of the voucher:
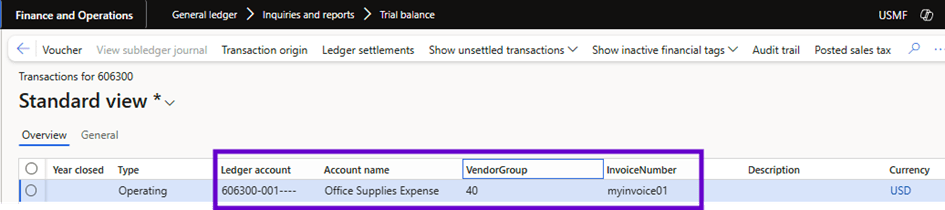
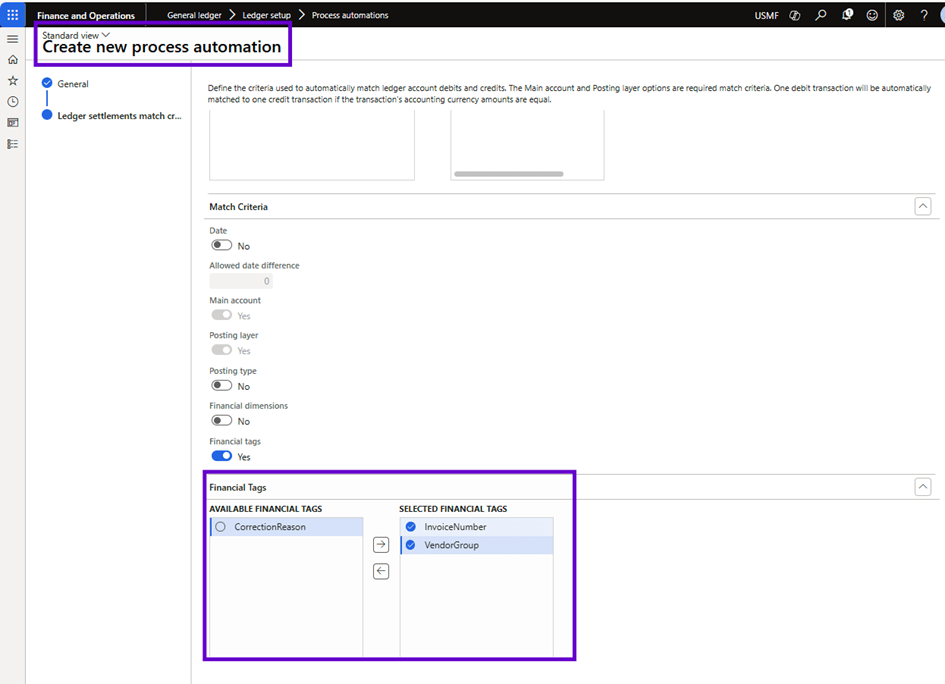
To generate reports or analyses, this can be particularly useful. It can also help to filter or group voucher transactions based on these values. If you are setting Ledger transactions, these values can also be used as matching criteria to find related transactions for settlement. For example, in process automation for automatic ledger settlements, financial Tags can be used to find matches:
Copy a financial Tag rule
When copying a financial Tag rule, there are two options for copying a financial Tag rule. Both require that you select a valid rule in the current legal entity as the source rule to copy.
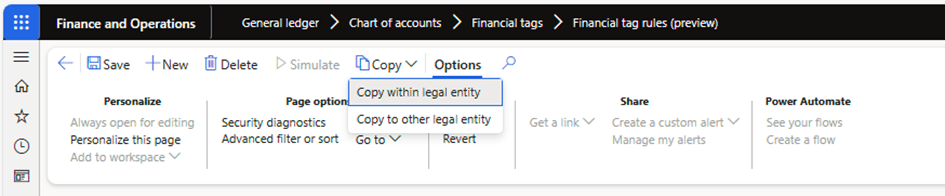
- Copy within a legal entity: this option copies a rule defined for one transaction entry point to another entry point in the same legal entity. On the first page of the copy wizard, you select additional transaction type destinations to which to copy the rule. On the second page of the wizard, you check your selections and then select Finish to complete the copy process.

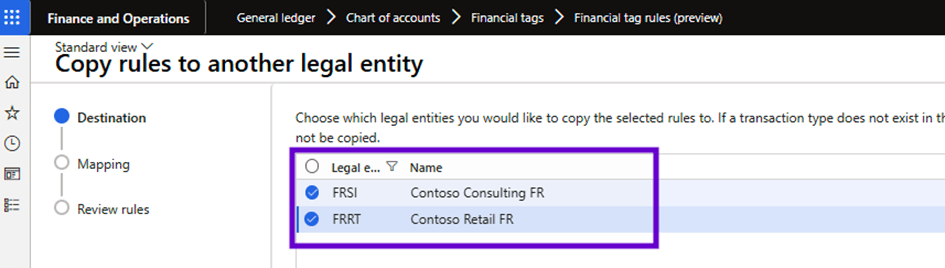
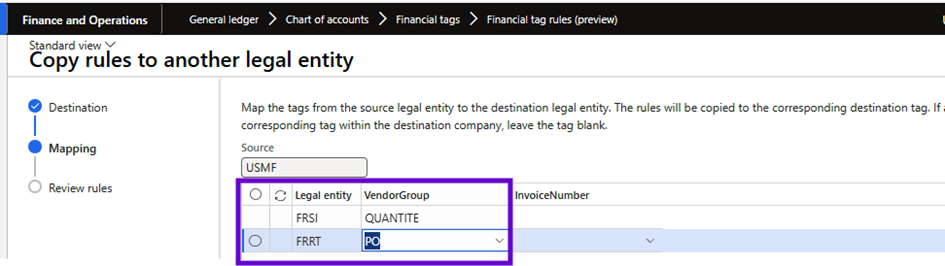
- Copy to other legal entity – This option copies the rules to any legal entity for which financial Tags are defined and active. Select one or more rules to copy to another legal entity. The first page of the copy wizard displays the legal entities for which one or more Tags are defined and active. The second page of the wizard maps the rule to a Tag with a different name on the Mapping Options page if there is a difference in the Tag name between legal entities. On the last page of the wizard, check your selections and select Finish to complete the copy process.
How financial Tagging rules apply to transactions
- When a record is created, the rules defined for the transaction entry point and transaction level execute the first default value of values in the corresponding financial Tag fields as defined for each target.
- For journals, when the account field or offset account field is set for all user-defined rules for the transaction level, financial Tags are populated for each target. It is important to know which rules have the Overwrite existing value option set to Yes. For these rules, all values previously defined by the user or a system rule are overridden.
- Once the final record is saved, the user rules are executed again to ensure the final replacement of the financial Tags. This replacement is based on the replacement that a user could have modified before saving the record or before moving to a new line (and thus causing the record to be saved).
Conclusion
Financial Tags were already a good option to add this information, but due to manual input in transactions, the added value was still limited. But with this new feature of Financial Tags rules, the use of Financial Tags will be much easier, and I think it will change the game in their use. There is much more value added now by having relevant information (subledger) available directly in voucher transactions.
It is therefore to be hoped that the list of entry points will soon be extended and that on even more types of transactions, information on financial Tags can be added automatically.

Leave a comment