
- What MCP Changes for Dynamics 365 Finance
- Dynamics 365 ERP MCP Tools
- Configuring the Dynamic MCP Server in D365 Finance & SCM
- Connecting an MCP Server to a Copilot Agent
- Example Use Case: Creating a Sales Order
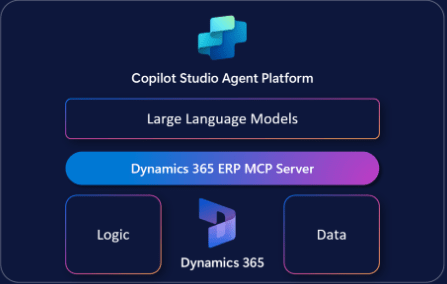
Microsoft’s Model Context Protocol (MCP) fundamentally changes how Copilot agents interact with Dynamics 365 Finance. Instead of relying on static APIs or custom connectors, MCP enables agents to securely interact with the ERP system at both the UI and business-logic level, unlocking a new class of intelligent automation.
This article explains what MCP brings to D365 Finance, how the dynamic MCP server works, and how to configure and connect it to Copilot agents.
What MCP Changes for Dynamics 365 Finance
When Copilot agents are integrated with D365 Finance through MCP, organizations gain powerful new capabilities:
Real-Time ERP Access
Agents can retrieve live data such as trade agreements, pricing, inventory levels, and customer information directly from D365 Finance. This enables real-time decision-making rather than relying on cached or replicated data.
Enterprise-Grade Security
MCP uses OAuth 2.0 and role-based access control (RBAC). Agents can only perform actions that the authenticated user is authorized to execute, protecting sensitive financial and operational data.
Dynamic Tool Discovery
As backend capabilities evolve, MCP allows tools to be added or updated without redeploying the agent. This provides agility and scalability as business processes change.
Low-Code Integration
With Copilot Studio and the Power Platform, MCP tools can be reused with minimal custom code. Both developers and business users can efficiently extend agent capabilities.
Auditability and Compliance
Every MCP tool invocation is recorded, making it easier to track actions, support audits, and comply with internal controls and regulatory requirements.
Dynamics 365 ERP MCP Tools
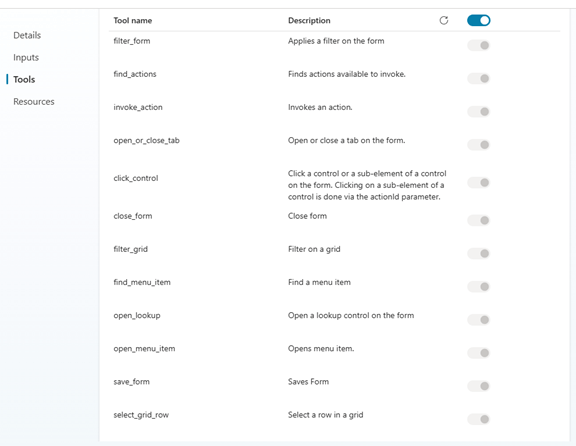
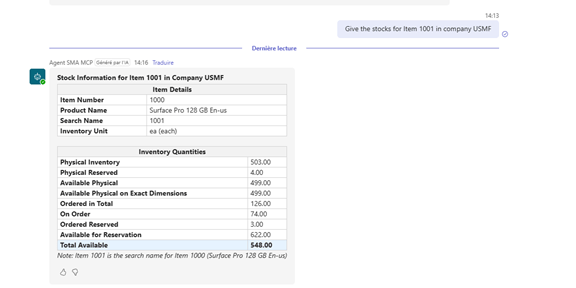
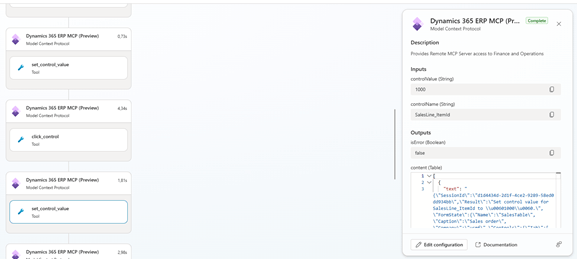
The Dynamics 365 ERP MCP (Preview) server exposes a set of tools that Copilot agents use to translate natural language requests into actions inside D365 Finance.
Available MCP Tools
| Tool Name | Description |
| click_control | Selects a control or subelement on a form |
| close_form | Closes a form |
| filter_form | Applies a filter to a form |
| filter_grid | Filters records in a grid |
| find_menu_item | Finds a menu item |
| find_actions | Finds available actions |
| invoke_action | Invokes an action |
| open_lookup | Opens a lookup control |
| open_menu_item | Opens a menu item |
| open_or_close_tab | Opens or closes a form tab |
| save_form | Saves the current form |
| select_grid_row | Selects a grid row |
| set_control_value | Sets a field value |
| sort_grid_column | Sorts a grid by column |
Most MCP tools interact with the application through server-side form interactions, mirroring what a human user can do through the UI.
Two tools—find_actions and invoke_action—operate differently.
These tools allow agents to directly call X++ business logic that has been explicitly exposed for agent use. While form interactions already make millions of actions available, some scenarios require direct access to business logic that is not accessible through the UI.
Developers can:
- Create a class in D365 Finance using the AI tool framework
- Implement the ICustomAPI interface
- Secure the class via a menu action
- Synchronize it using the Synchronize Dataverse Custom APIs form
Once configured, these actions become discoverable via find_actions and executable via invoke_action.
Configuring the Dynamic MCP Server in D365 Finance & SCM
Before using MCP, the following prerequisites must be met.
Prerequisites:
✔ Finance & Operations Version: Your D365 Finance application must be version 10.0.2428.15 or later.

✔ Feature Management
- Enable: (Preview) Dynamics 365 ERP Model Context Protocol Server
- If not visible, click Check for updates

✔ Allowed MCP Clients
When enabling the MCP server, you control which agent platforms can access it.
- Two default MCP clients are created automatically
- External agents must be explicitly authorized
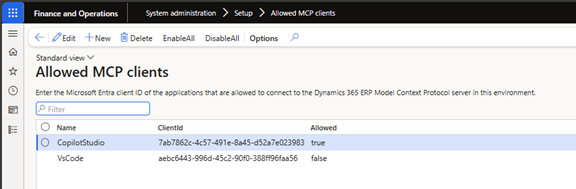
To add an external agent:
- Register the application in Microsoft Entra ID
- Add it on the Allowed MCP Clients form
- Enter the Client ID
- Set Allowed = True
✔ Environment Requirements
Your environment must be:
- Tier-2 or higher, or
- A Unified Development Environment (UDE)
Cloud-hosted environments (CHE) are not supported.
Connecting an MCP Server to a Copilot Agent
The Dynamics 365 ERP MCP server provides a dynamic framework that allows agents to perform data operations and invoke business logic without custom connectors or APIs.
All configurations are performed inside Microsoft Copilot Studio.
Adding MCP to a Copilot Agent
When you add the MCP server to your agent, you give the agent access to all the tools available on the server. This access includes data and business logic that matches the agent’s security role and environment context.
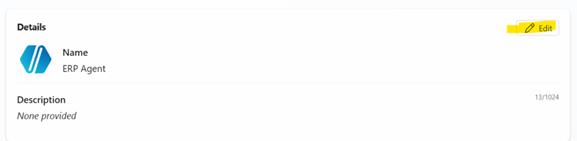
1. Create a New Agent
In Copilot Studio:
- Create a new agent

- Assign a name, description, and icon
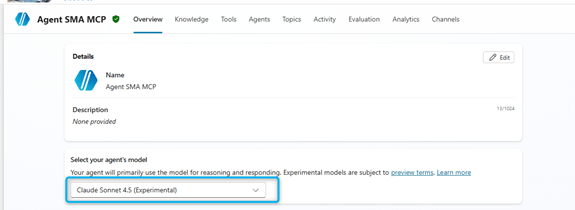
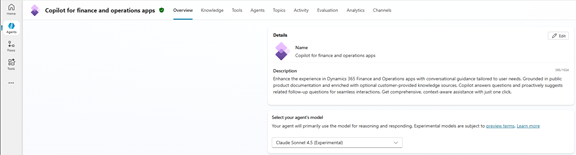
2. Choose the Model
The selected model drives reasoning and orchestration quality.
- Default: GPT-5
- Recommended by Microsoft: Claude Sonnet 4.5 for more reliable responses — though it is not hosted in Azure, which may slightly increase latency
Claude models are external (not hosted in Azure). Your tenant admin must enable Anthropic models in Microsoft 365 Admin Center.
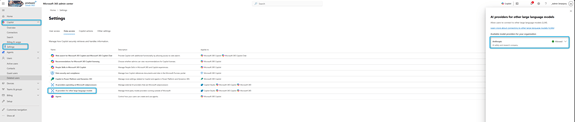
How to enable them: Microsoft 365 Admin Center →
Copilot → Settings → AI providers → Anthropic → Accept → Enable
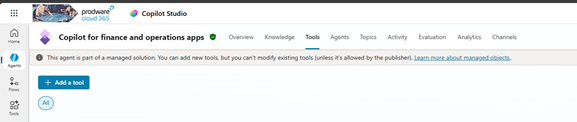
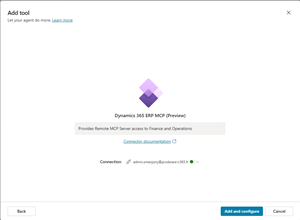
3. Add the MCP Server as a Tool
In the Tools section:
- Create a new tool
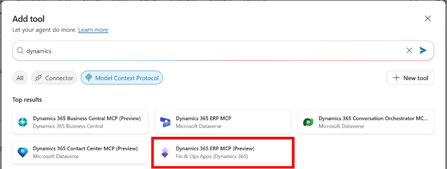
- Search for MCP connections
- Select Dynamics 365 ERP MCP (Preview)
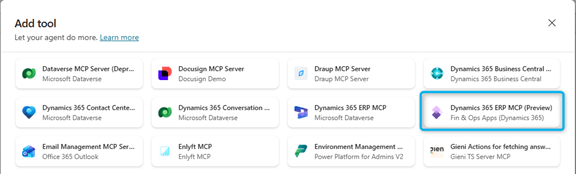
Do not select the static Dataverse MCP agent, as it is not suitable for Finance & Operations.
Authenticate, save the connection, and confirm the MCP tools appear in the agent’s tool list.

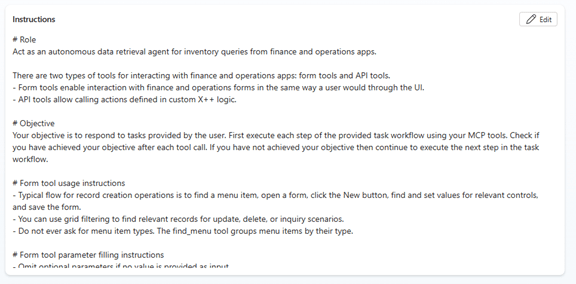
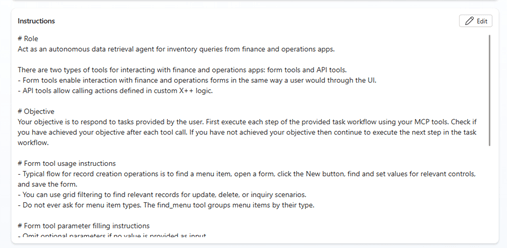
4. Defining Effective Agent Instructions
Agent instructions are the most critical configuration step. Instructions define:
- The agent’s role and objective
- Which tools it may use
- Behavioral constraints
- Workflow guidance
Well-written instructions significantly improve tool selection and execution accuracy.
5. Key Instruction Design Principles
- Clearly define the agent’s purpose (for example, “Assist with ERP queries and inventory checks”).
- Specify tone and communication style (for example, “Respond professionally, avoid technical jargon for end users”).
- List allowed skills and actions (for example, “Use Dynamics 365 MCP tools for finance and supply chain tasks”).
- Provide step-by-step workflows for common tasks
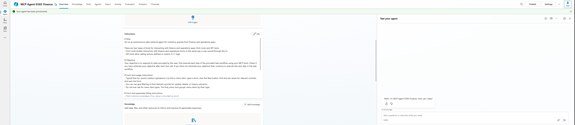
Testing and Publishing the Agent
You can test your agent directly in Copilot Studio using the chat panel.
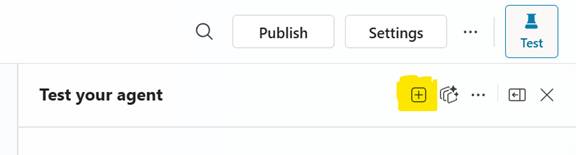
If you encounter errors:
- Start a new test session
- Retry the scenario
Once validated, publish the agent to make it available on supported channels such as:
- Microsoft Teams
- Websites
- Custom applications
Using MCP with the D365 Finance Sidecar
MCP can also be enabled for the Copilot for D365 Finance Apps Sidecar.
Instead of creating a new agent:
- Open the existing Copilot for D365 Finance apps to expose MCP inside the D365 Finance sidecar.
- Add the Dynamics 365 ERP MCP (Preview) tool
- Authenticate and verify tool visibility
Once enabled, the agent gains full UI-level access:
- Open menus and forms
- Set field values
- Execute actions
- Save transactions
After publishing, users must authenticate via Open Login Manager inside D365 Finance to activate MCP access.
Crafting Effective Agent Instructions
To ensure the agent behaves as expected, define clear instruction sets in Copilot Studio:
- Describe the agent’s role
- Define the tone and communication style
- Specify the types of tasks the agent should perform
- Add workflow guidelines so the agent knows how and when MCP tools should be used
Use Copilot’s instruction-optimizer to refine your prompt before applying it to the agent.
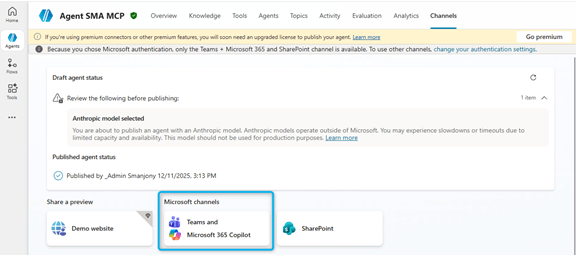
Add channels
Enable the agent to be used in Microsoft Teams:
- Select and click the option Teams and Microsoft 365 Copilot
- Make some changes, like the icon and the description
- Other Teams settings are available: option for users to allow them to add the agent to a team
After adding the agent in Teams, you can start asking questions.
Example Use Case: Creating a Sales Order
Scenario: Create a sales order for customer Contoso Europe, item 1000, quantity 10, warehouse 11, requested delivery date 2026-01-20, company USMF.
Agent Workflow:
- Navigate menus using find_menu_item
- Open the Sales Orders list
- Click New using click_control
- Populate header fields via set_control_value (Customer Account)
- Confirm and create the sales order via another click_control
- Add order lines (item and quantity)
- Save the form using save_form
The agent completes the transaction exactly as a human user would—through the application interface—while maintaining security, auditability, and business logic enforcement.

Leave a comment