To send an email from Dynamics 365 Finance and Operations (D365FO) using Microsoft Graph, you need to follow several steps, including setting up the necessary permissions in Azure and configuring the email provider in D365FO. Here are the steps but before that lets understand what Microsoft Graph basically is.
Understanding Microsoft Graph
Microsoft Graph is a bridge that connects multiple services and devices within the Microsoft 365 ecosystem. It provides a unified programmability model that developers can use to access a wide array of data and insights stored across various Microsoft 365 services, such as Outlook, OneDrive, Microsoft Teams, and more.
By using Microsoft Graph, developers can build applications that interact with this data to enhance organizational productivity, facilitate communication, and streamline workflows. It offers REST APIs and client libraries to enable access and integration with the rich data and capabilities available in the Microsoft cloud.
Email Integration with Microsoft Graph:
For Office 365 users, Microsoft Graph is the preferred email provider for Dynamics 365 Finance and Operations applications. This email provider replaces the deprecated Exchange email provider. Take action now to complete a transition to the Microsoft Graph email provider before then to avoid missing emails.
Required Permissions for Microsoft Graph Integration Setup with D365FO:
To configure the Microsoft Graph integration, you need the following permissions:
- You must hold system administrator rights within the application to connect the Dynamics 365 Finance and Operations environment with Microsoft Graph.
- You need to be an administrator of your Azure Active Directory (Azure AD) account. If you lack these administrative privileges, an authorized user must complete the initial configuration on your behalf.
Configure Microsoft Graph
Register an App on Azure Portal
1. Sign in to the portal.azure.com by using an Azure tenant admin account.
2. Go to Azure portal home page > Click App registrations.
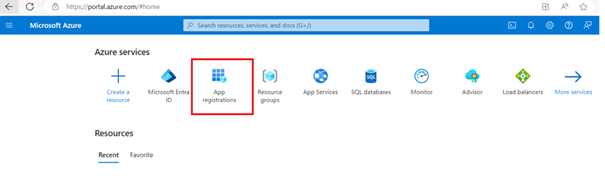
3. In App registration, click New registration

4. Under the register an application section, Enter the following values:
· Name – Enter the name of your app e.g. “D365FOMails”
· Supported account types – Enter only accounts that are directly in this organization (single tenant).
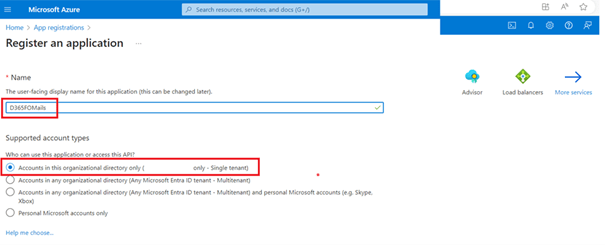
5. Then click the Register button at bottom.
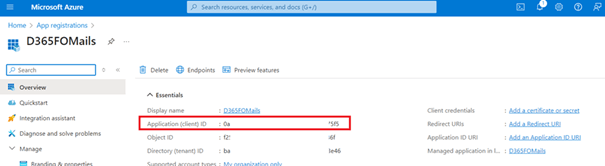
6. Once the app is created, copy the Application (client) ID as you will use this value to connect to the Microsoft Graph service from your finance and operations environment.
7. To add the permissions, kindly go to Manage > API permissions.
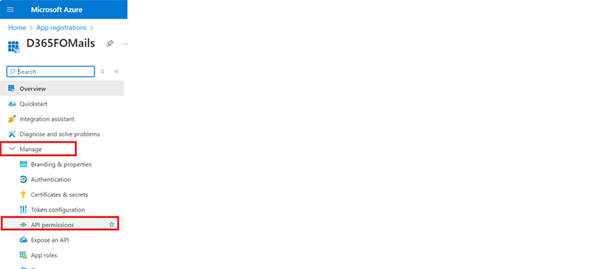
8. On API permission page, Click Add a permission.
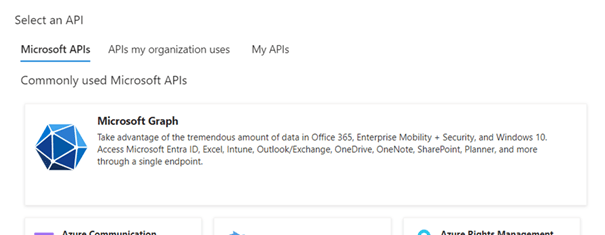
9. And then select Microsoft APIs >> Microsoft Graph.
10. After that click Application permissions option which will enable the “select permission section”.
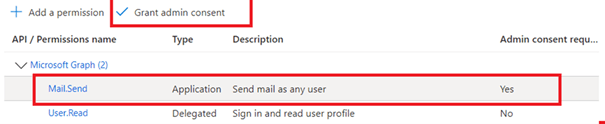
11. Then search for Mail.Send permission and enable it by marking the checkbox.

12. By default, the app should include the User.Read delegated permission for Microsoft Graph.
13. If that permission is missing, you must add it from the delegated permissions.
14. Select Add permissions button at the bottom.
15. Then select Grant admin consent for to allow emails to be sent.
16. Now, create a client secret, Go to Manage menu again and click Certificates and secrets.
17. On the Client secrets tab, select New client secret.

18. Enter a value in the Description and Expires fields, and then select Add button at the bottom.
19. Make a note of the Secret value.
20. You will use this value to connect to the Microsoft Graph service from your Dynamics 365 finance and operations environments.
Configure Microsoft Graph in Dynamics 365 Finance and Operations
1. In D365FO, go to System administration > Setup > Email parameters page.
2. Go to configuration menu > Enable the Graph provider ID.

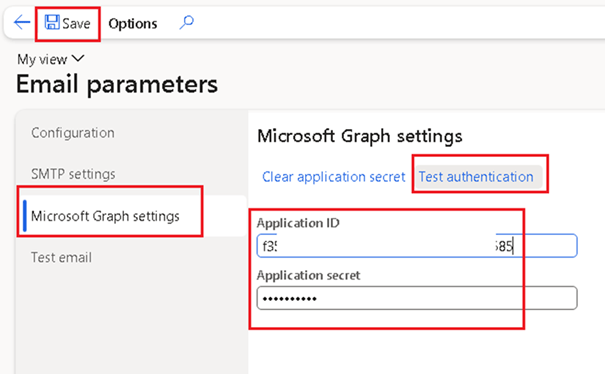
3. Then go to Microsoft Graph Settings > Enter application Id and application secret value copied from the Azure app registration and click Save.
4. Test the connection by clicking the Test authentication link as shown in below image.
5. And then test the email by clicking the test email option from the left menu, if needed.


Leave a comment