
This post describes a valuable feature» in D365FO: the advanced filter or sort. It can really be helpful to understand this filter because you have several ways to use an extended filter here and join new tables to extend your filters if necessary. In addition, multiple filters can be saved, and sorting options can be set across multiple columns.
In almost all forms on the Action pane tab ‘Options’ of the Action pane, you can find the “Advanced Filter or Sort” feature:

When you click this option, a pop-up window opens in which you can configure extended filters and manage the sorting of results. Depending on the form from which you open the “Advanced filter or sort” option, some basic filter lines are already created. When you open this option, for example from the form “All Customers,” you will find the following sorting tables and fields already visible:

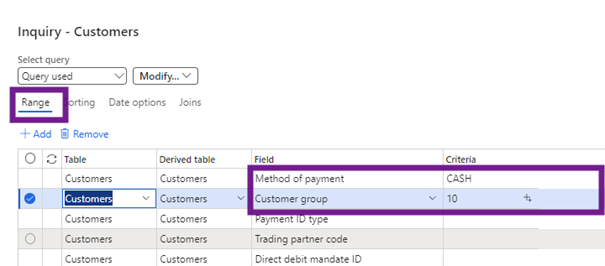
In the “Range” tab, you can define filters to obtain the required data range. Pre-defined fields for filtering are already added, but via the «+ Add» button you can create additional lines that you can use in the filter. For each row, you can select the available tables and fields and enter criteria that should be used to get the desired result based on all the criteria you enter. For example, if I want a list of all the Customers in the Customer group “10” with the payment method “CASH”, I enter both values in the lines:
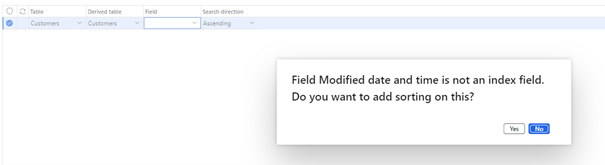
If you want the filtered result to be sorted in a specific way, you can click on the tab «Sorting» and select the sort you want by adding new sorting lines and setting the sorting criteria. I entered a sort line where I define that the list of Customers should be presented according to the field “Modified Date and time,” in ascending order:

Be careful with the fields you choose to sort, you can add unindexed fields that will have an impact on performance and a warning message is displayed:
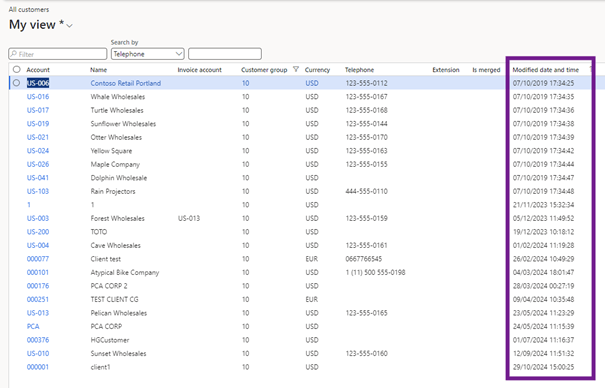
The result is now that Customers are sorted according to this field:
You can also add multiple rows to sort, where via the “Up” and “Down” buttons you can select the sort order you need:

The “Date Options” tab is not available in all forms. When available, you can use this tab to filter the data you want to see based on how long something has been active.

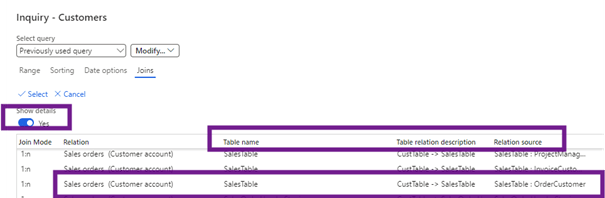
In the “Join” tab, you will find tables that can be used on the “Range” tab for the advanced filter or sort according to the form where you use it:

If you want to add another field to use in this filter based on a table that is not already in this list of tables, you can select one of the tables and click the button “+ Add table join.”

A list of available tables is displayed, and you can create a link to have additional fields for filtering. Selecting the “Show details” option here will add three more columns to this list with additional information on which tables you can use:
When you have selected the table, you want to add, you can click on the “Select” button above the list of tables (do not click on «Ok» at the bottom of the form if you want to add a join because with the button «Ok», the filter will be executed). In this example, I am attaching the “SalesTable” to add the Sales order information to the filter for customers.
The attached table will now be displayed in the list of tables that can be used in the “Advanced filter or sort” menu:

Based on this table attached in the tab «Range», I now add a new line based on the Sales order table where I filter all orders with the site with a value of 1:
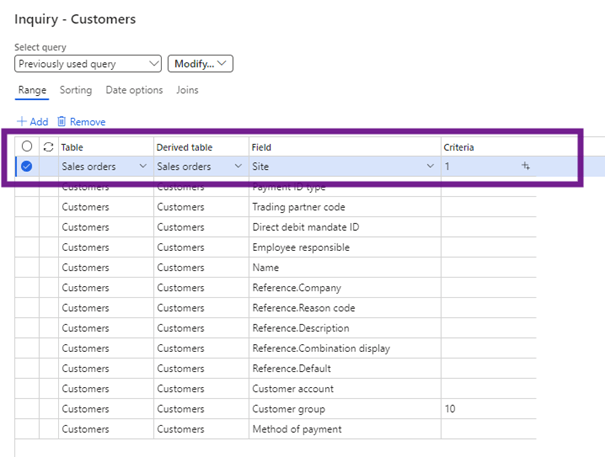
Based on the created join (table added) and values entered here, only customers who have at least one order with a site = 1 will be presented:

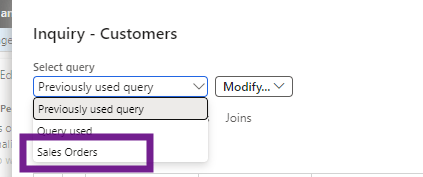
You can save the settings for each filter, so they are available on your personal saved filters list:

The next time you open “Advanced Filter or Sort” in this form, you can easily select one of the previously saved filters to get all the associated parameters:

Leave a comment