
Introduction
FastTrack Implementation Portal is a web-based platform that helps customers and partners accelerate their cloud adoption journey with Microsoft. This portal provides access to resources, tools, and best practices, as well as guidance on planning, deploying, and adopting Microsoft cloud services. This portal also allows customers and partners to track their progress, manage their tasks and collaborate with FastTrack engineers and experts.
Log in to Implementation Portal
If you are a partner or customer, you can log in to the Dynamics 365 Implementation Portal https://aka.ms/D365ImplementationPortal with a work account (Microsoft Entra ID) or a personal Microsoft account.
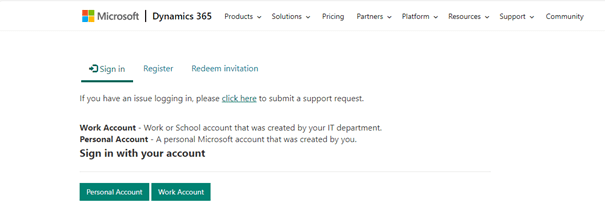
If you are a tenant administrator and log in with your work account, the system recognizes your Microsoft Entra ID tenant and logs you into your projects.
First connection
The first time you log in, you will see the Profile page where you must fill in your details:
- First Name: Your first name.
- Last Name: Your family name.
- Email: This field is prefilled based on the account that you are signed in with. The field is not editable.
- Title: Your job title or designation in your organization.
- Company Name: The name of your company or organization.
Once completed, choose the Update action to save the information.
Profile
Log in to the Implementation portal and choose the Profile menu item under your account name in the upper right corner of the window to update your user profile and upload a photo.

Nominate projects for FastTrack
You can now designate a project for FastTrack engagement in the Dynamics 365 implementation portal.
Prerequisites
- A project must already exist before the client can be nominated. Microsoft uses the project profile to get project details and automatically route it to the right team.
- If you do not have a project, create, or join a project.
Update the project profile
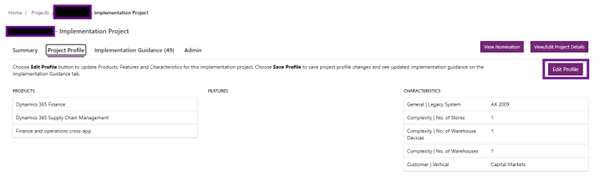
Open the project and go to the Project Profile tab.
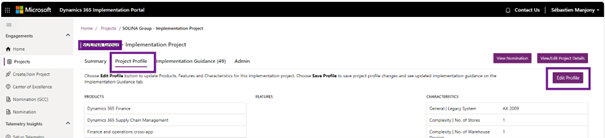
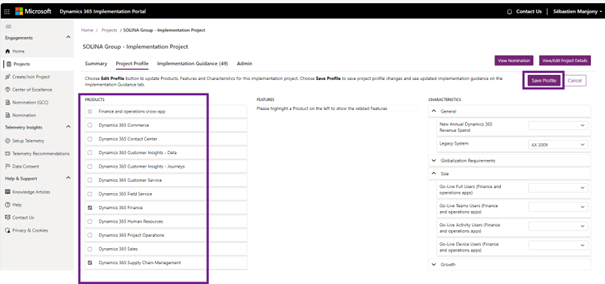
Update the profile by adding as much information as possible in the Products, Features and Characteristics sections, then save the profile using the Save button.
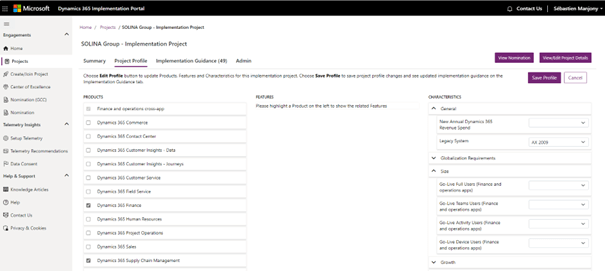
The Products and Features sections are linked. Depending on the product you select, the associated features will be displayed.
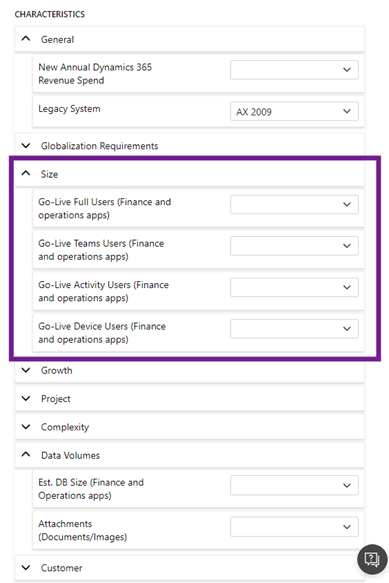
The Characteristics section contains fields important for the nomination, such as Annual Dynamics 365 Revenue Spend, Number of users, Complexity, etc. Make sure you profile the project with as much information as possible.
The FastTrack Naming action becomes active once you have selected fields that match the requirements.
Details of the Nomination
Once the Nominate for FastTrack button becomes active, choose it and then enter the required details.
Complete all required fields in the Nomination and Nomination Details streams, then select the next action to proceed.

You must provide information about the customer and your partner, including the name and email address of the primary contact. You must also provide a tentative start and go live dates for the project, as well as information on the business model.
Once completed, review the project profile details, make any changes and save the changes.
When you are ready, check the details again and select the Submit action at the bottom of the page.
Follow the Nomination request
Once the nomination has been submitted, you can view the nomination request in the Engagements > Nomination section of the Implementation Portal. You will receive an email with the next steps of the Nomination.

A good profile
Profile details
A good profile in the Dynamics 365 implementation portal is important because it helps you and Microsoft ensure that the right context is available for proactive advice and support. Project details, such as the full list of products being implemented and the functionality of each, play a critical role in the profile details. The implementation tips are adapted to your project based on the profile information. You can update the project profile in the Project Profile tab.
Keep profile up to date
A good profile should also specify the products, features, and growth characteristics of the implementation project. We suggest that you add the profile when creating the project and keep the profile up to date as the scope and details of the project evolve during implementation. It is recommended that the profile be kept up to date at regular intervals to reflect the reality of the project.
Here are some examples of what a good profile should include:
- Products: All products affected by the implementation project.
- Features: Features being implemented for the project products.
- Size: the number of users using the system, the number of locations where the system is deployed and the amount of data processed.
- Complexity: the number of customizations required, level of integration with other systems and level of data migration required.
- Growth: The expected system growth rate, the expected number of users and the expected number of locations.
- Other characteristics: As detailed as possible. Any information allows the portal to adapt pro-active specific information relevant to the project.
On the other hand, a bad profile is an incomplete or missing profile of details. For example, a profile that specifies products would not be useful in tailoring implementation guidance to the project.
If you are a partner in the partner portfolio model, good project profiling across all projects increases the portfolio score.
How to create a profile
The following is a step-by-step guide to profile a project in the Dynamics 365 Implementation Portal:
- Log in to the Dynamics 365 Implementation Portal using your work account or your personal Microsoft account.
- In the left panel, select Projects.
- Select the project you wish to manage.
- The Project Profile tab gives you an overview of all project details. You can switch between the read-only and editable views in the Project Profile tab.
- Use the project profile to specify the products and features of the implementation project. The implementation instructions are adapted to your project based on the information contained in the profile.
- When you select a product, the page displays the product features.
- Select Done to save your changes. A notification at the top of the page tells you that the implementation instructions are based on the changes you made. When the message Instructions have been generated successfully appears, select the Implementation guidance tab to view updated recommendations.

Leave a comment